

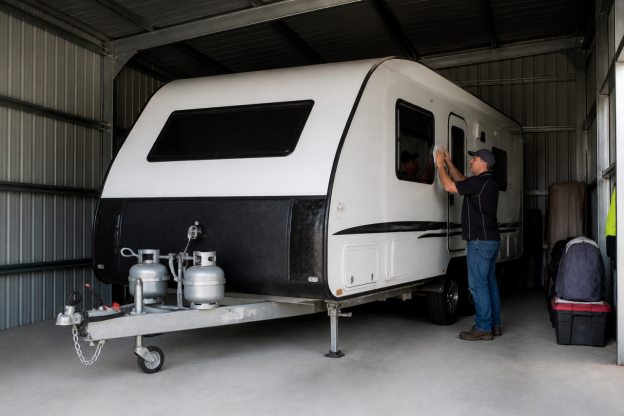
Most caravan owners are confident once they are on the road. It is the months in between that catch people out. A van sitting idle on a driveway or in a storage compound can quietly accumulate mould, flat-spotted tyres, a dead battery, cracked seals and pest damage, often because the owner did everything with good intentions but skipped a few critical steps. Getting the caravan storage and protection tips right costs very little time, but the difference between a van that is road-ready in an afternoon and one that needs a week of repairs before it moves is almost always down to what happened during the lay-up.
This guide gives you a practical, step-by-step routine: how to pick the right spot, prep the van inside and out, look after the mechanical bits, choose and fit a proper cover, secure the van against thieves and bad weather, and bring it back into service quickly and safely. Work through it once and it becomes second nature.
How to Store and Protect Your Caravan Between Road Trips (Without Wrecking It)
Pick the Right Storage Spot Before You Park Up
Where you park the van during a lay-up shapes every other decision. Home storage — driveway, side of the house, carport — is the most convenient and usually the cheapest option, and it means you can keep an eye on the van daily, carry out checks easily and head off at short notice. The trade-off is space, possible council restrictions on long-term kerbside or front-garden parking, and the simple fact that a van sitting outside your house is visible to anyone who passes. Always check your local council rules before committing to a long-term spot at home.
Paid storage facilities range from open-air compounds through covered bays to fully enclosed indoor units. Indoor storage offers the best protection from weather and UV, and reputable facilities add CCTV, gated access and on-site staff. The downside is cost: covered bays in the UK typically run from around £30 to £100 per month, and indoor units can reach £200, plus there is reduced access and the inconvenience of travelling to check on the van. Some premium facilities also offer optional maintenance services, which can be worth it for long winter lay-ups. If indoor or covered storage is out of reach, some caravan owners rent space on private rural land; just make sure the site is secure and that you have a clear agreement with the landowner.
Whatever spot you choose, the surface matters. Firm, level ground — concrete, pavers or well-compacted gravel — is far better than soft soil or lawn, which allows stabilisers to sink, water to pool under the van and tyres to degrade faster. Orientation matters too: where possible, park nose-to-prevailing-wind to reduce wind load on the body, and avoid sitting directly under large trees. Falling branches are an obvious hazard, but ongoing drips of sap, leaf debris and bird activity will work their way into seals and vents over months. Partial shade helps with UV, though a quality breathable cover can compensate well where shade simply is not available.
Run through this quick checklist before committing to any storage location: the ground is solid, level and drains freely after rain; the spot is not in a low-lying dip prone to flooding; there is enough room to walk all the way around the van; you can open doors and the awning without obstruction; a cover can be fitted and secured properly; and you can visit and inspect the van regularly without it being a major expedition.
Pre-Storage Prep: Clean, Dry and De-Clutter So It Stays Fresh
The single biggest mistake owners make before a lay-up is putting the van away damp or dirty. Road grime, salt residue, bird droppings and dead insects are mildly acidic, and left against paintwork and seals for months they cause staining and surface damage that is far harder to fix than it would have been to wash off in an hour. Give the exterior a thorough wash and rinse, let the van dry completely, then walk the roof and check every seal, window frame and vent before you put a cover on. Any cracked or lifting sealant you find now costs almost nothing to address; miss it and you may be dealing with water ingress and timber damage by spring.
Inside, reset the van completely rather than just tidying it. Empty everything that can leak, ferment or attract pests — food, toiletries, condiments, anything in soft packaging. Strip beds and stand seat cushions on edge so air can circulate around them, because cushions left flat tend to hold moisture against their bases. Wipe hard surfaces down with a mild cleaner and open every locker as you go, looking for any signs of damp you can deal with now rather than later.
The fridge needs specific attention. Defrost it fully, clean the interior, dry it thoroughly, then prop the door ajar with a folded cloth or a small clip, because a fridge sealed shut for months will almost certainly develop mould. The same principle applies to the rest of the van’s interior: cupboard doors and internal doors should be left slightly open for airflow, as should the bathroom hatch if there is one. Roof vents and windows should be mostly closed for weather and security reasons, but on secure sites where the forecast is settled, a night-latch position on a vent or two helps considerably.
For pest prevention, vacuum thoroughly paying attention to corners and beneath seating, then remove bins and avoid leaving any loose food packaging. Consider placing sealed moisture traps or non-toxic deterrents in cupboards, and mesh over external vents where insects or rodents are a known problem in your area. Finally, avoid cramming heavy items high in overhead lockers; six months of small vibrations from wind movement can shift them, distorting cupboard doors or bringing them down altogether.
Look After Tyres, Battery, Gas and Water While It’s Parked
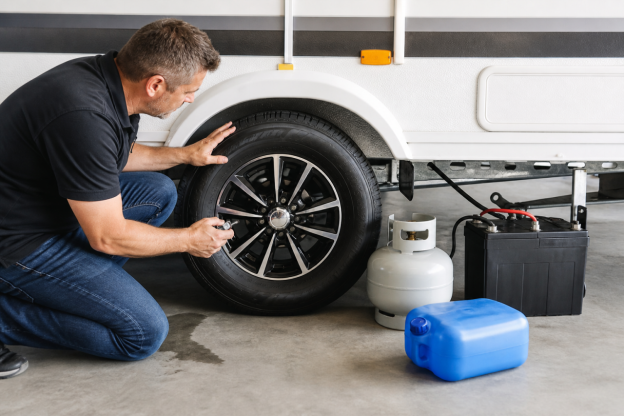
On the day you park up, get the basics right before you walk away. Position the van on level ground, lower the corner steadies enough to take some of the load off the suspension — but do not use them as jacks — and place wheel chocks front and rear of the tyres rather than relying on the handbrake. A handbrake left on for months can cause the brake shoes to bond lightly to the drum, making the van very reluctant to move when you eventually pull away, so once the van is chocked securely, release it.
Typres are one of the most overlooked areas of storage damage. Inflate them to the manufacturer’s recommended pressure before the lay-up, because a tyre sitting slightly soft for months develops a flat spot that you will feel through the tow vehicle for the first few kilometres of the next trip. If the van is parked on bare soil, place boards or pads under the tyres and jockey wheel to spread the load and keep rubber away from ground moisture. Where you can, roll the van forward or back a short distance once a month so the contact patch moves; this alone prevents most flat-spotting.
For the battery, a full charge before storage is essential. Either disconnect the negative terminal to prevent slow drain, or fit an isolator. For lay-ups longer than a few weeks, a smart trickle charger or a small solar maintainer keeps the battery healthy without overcharging it, just make sure any mains connection has proper RCD protection. Do not leave a standard charger running unattended in a paddock or unmonitored driveway.
Gas bottles should have their valves closed, all appliances turned off and protective caps fitted. Whether you leave bottles mounted on the van or store them separately in a ventilated shed depends on your local regulations and insurance terms, so check both. For the water system, open taps at the lowest points, empty every tank — fresh, grey and the hot water system if fitted — then run the pump briefly to clear the lines. Leave taps in the half-open position so any residual pressure cannot build up. In areas where frost is a genuine risk, follow your manufacturer’s guidance on a suitable non-toxic treatment for the lines and pump, and clean and dry the toilet cassette before putting it back.
During the lay-up, try to visit the van at least monthly and always after any major storm. A ten-minute walk-round — checking tyre condition, looking for fresh damp streaks, confirming the cover straps are secure but not chafing, and airing the interior briefly on a dry day — catches small problems before they compound.
Look After Tyres, Battery, Gas and Water While It’s Parked
Caravan Storage and Protection Tips: Using the Right Cover Safely
What to look for in a quality cover: breathable fabric that lets moisture vapour escape rather than trapping it inside; a soft inner face that will not scratch; a UV-resistant outer layer; a fit matched to your van’s make and model, or at minimum its length and body shape; reinforced panels at gutters, door openings and mirror areas; and padded straps or belly bands that run under the chassis rather than across sharp body edges. The right spec also depends on where you are. In wet or coastal areas, prioritise breathability and corrosion-resistant fittings; in high-UV, windy regions, focus on UV resistance and strong stitching with enough tie-down points to keep the cover stable in a gust. If the van lives under a roof, a lighter dust cover may be all you need. These frequently asked questions about caravan covers work through cover materials, sizing, fit and care in more detail, and are worth going over before you buy.
Protect Against Thieves and Wild Weather While It Sits
Physical security works best in layers. A quality hitch lock and at least one wheel clamp make the van very difficult to tow away quickly, and visible devices are a strong deterrent at home and in paid compounds alike. Corner steadies, if your van is fitted with them, add another layer, and in long-term storage it is worth fully lowering them as an additional obstacle to anyone attempting a quick getaway. The goal is not to make theft impossible but to make your van a harder target than the one next to it.
On the electronic side, a door or locker alarm alerts you — and announces itself to anyone nearby — if someone is in the van when they should not be. A GPS tracker hidden inside the van goes further: if the van moves unexpectedly, you know about it in real time. Some insurers offer premium reductions for tracked caravans, so it is worth checking your policy terms. Always inform your insurer of your storage location and any security devices fitted, and confirm that your cover includes theft, vandalism and weather damage while the van is in storage, not just when it is on the road.
For storm protection, park with the A-frame or rear facing the prevailing wind where possible, reducing the surface area the wind pushes against. Clear any loose items from around the van before a storm — garden furniture, tools, anything that can become a projectile in a gust. Ensure the cover is properly secured and that awnings and annexes are fully retracted and stowed; an awning left partially extended in storage will almost certainly be damaged in a strong wind, and the tear can extend to the wall fixing point, which is an expensive repair. Avoid low-lying spots where rainwater gathers after heavy rain, and keep roof gutters and drains clear of leaves so water can escape cleanly. In hail-prone areas of Australia, covered storage is worth pursuing where you can access it, or a cover specifically rated for impact resistance if you cannot.
Beyond the cover, if the van sits uncovered for any period, try to rotate which side faces the sun between seasons to even out UV exposure and fading. Internal blinds or reflective covers protect soft furnishings from heat build-up during Australian summers, and on secure sites, cracking a roof vent slightly lets trapped heat escape without creating a meaningful security risk. Visit the van at least once a month in damp or cold conditions and after any significant weather event, checking locks, cover tension, security devices and any sign of forced entry, leaks or fresh condensation. A brief air-out on a dry, settled day takes fifteen minutes and makes a real difference to what you find when you eventually come to use the van again.
Wake-Up Routine: Quick Checks Before Your Next Trip
If you have worked through the steps above, bringing the van back into service should take a morning rather than a week. Start outside with a full walk-round: look for tyres that have sagged since your last visit, fresh cracks in bodywork or trim, green streaks down the sides that suggest water has been tracking somewhere it should not, and any sign the van has been knocked or tampered with while parked.
Remove the cover on a calm, dry day. Brush loose debris off the top first — never drag a cover loaded with grit along the bodywork — then fold it dry and store it somewhere clean so it is ready for the next lay-up rather than sitting damp in a bag developing its own mould.
For the mechanical basics: inflate tyres to the correct pressure, test the handbrake and overrun coupling at low speed before you set off, and listen for anything unusual as the van first rolls. Reconnect or reinstall the leisure battery, then test the 12-volt systems and any mains connections. Close all taps, refill the fresh-water system and run it up to pressure, checking for drips at fittings as it pressurises. Refit gas bottles, open the valves and test each appliance one at a time with windows open.
Inside, inspect the ceiling corners, around every window frame and inside base cupboards for damp patches or mould. If you find any, deal with it before the trip and trace where the moisture came from. Test smoke and carbon monoxide alarms, and confirm the fridge reaches temperature on the energy source you plan to use first.
Finally, run the roadworthiness checks that keep you legal and safe: all lights and indicators working, breakaway cable attached and in good condition, number plate clean and legible, mirrors adjusted, and every locker, rooflight and the main door firmly latched before you move. Put the van away properly and this checklist should feel like a formality, leaving you free to spend the evening before your trip planning where you are actually going.
